BoardDrive allows you to upload photos to a share (also known as network drive or server or network folder) within your local network. After the initial setup it will remember your settings and allow you to upload to the last location with one touch of a button.
Initial Setup
To set up BoardDrive for the first time, you need to tell it which network destination to use. The name of the device (or it's IP address), and a user name and password are all you need.
Once you provide this information, you can choose a destination folder. BoardDrive will offer to automatically name a sub-folder for you before the upload. The sub-folder is a kind of tag for your media. If you have the full version of BoardDrive, it will look in your calendars and find the appropriate events for the media you selected. If you have the Lite version, it will only offer today's date or your name. If none of the offered names work for you, you can manually type in the name that you want.
Setting up a network destination
To set up a network destination:
- On the main screen, touch the box that says No upload destination.
- On the dialog that pops up, touch the Plus button at the top.
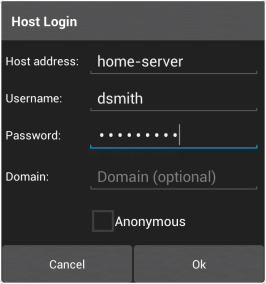
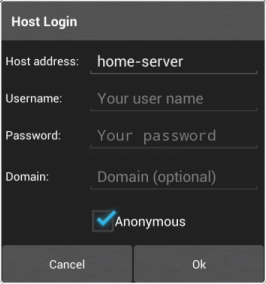
- A new dialog will pop up, asking you for the connection details. Fill it out and touch OK, then select your destination and click Done. Below are some examples of the filled-out dialog.
Note:
You can connect and upload photos to a regular computer or laptop as well. You can use your
computer's name as the host address (i.e. John-PC or Melissa-LAPTOP).
More details
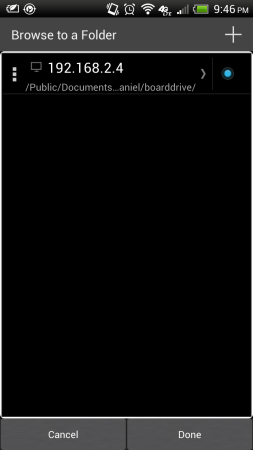
Picking a folder
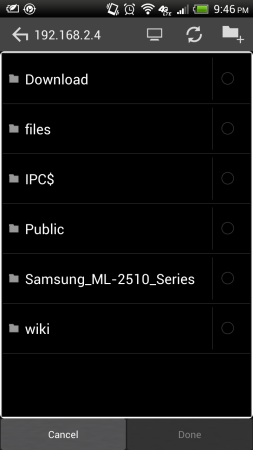
After the connection has been set up, you can browse to the folder where you want to upload your photos and select it. Browsing works just like selecting a folder in Windows Explorer or any other file manager. To select the folder you want, touch the circle to the right of the folder.
Note:
Depending on how you use BoardDrive, the folder you select will be used to upload files directly,
or to create additional sub-folders inside the folder you picked and upload the files into those.
How does BoardDrive know to create sub-folders or not? You can turn this feature on or off on the
main screen by unchecking the checkbox. Take a look at the screenshot below.
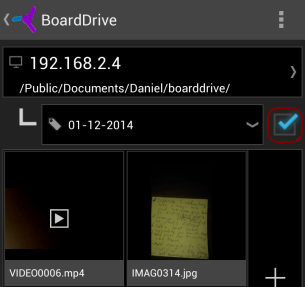
Choosing files to upload
There are two ways to pick files to upload: you can pick files from a gallery inside BoardDrive, or you can share a file from inside your camera app. The supported types of media are photos, videos, and audio recordings.
To pick files from inside BoardDrive:
- On the main screen, touch the the Pick button on the right.
- Select the type of media you want to browse.
- Check the files you want to upload using the checkbox in the top right corner of every file.
- You can pick some media of one kind and some of the other. You can even leave BoardDrive and come back later to finish choosing the files you want. It will remember and start where you left off.
- Touch the Done button when you are done picking files.
To pick a file from the camera app:
- In your camera app, take a picture or record a video.
- Select the picture or video from the camera's gallery, touch it, then touch the Share button.
- Select BoardDrive from the list of apps to share.
- If you are in the middle of choosing files to upload, this file will be added to the current list automatically.
Naming preferences
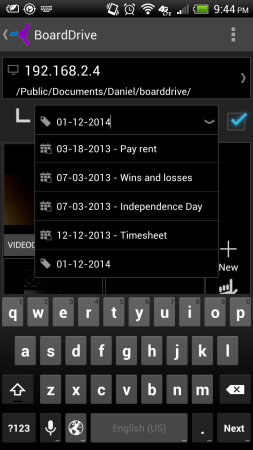
BoardDrive can offer you sub-folder names based on calendar events, today's date, and your name (if you provided one). If you are using the Lite version of BoardDrive, only today's date and your name are used.
Before uploading a photo, you can pick a sub-folder name from the drop-down on the main screen, or if you want to directly upload to the folder you picked, uncheck the checkbox next to the drop-down. Below is an example of the drop-down with some suggested names.
To pick calendars where BoardDrive should look for events names (not available in Lite version):
- Touch the Menu button or the drop-down button in the top navigation bar.
- Touch the Calendars option.
- Check the calendars where you want BoardDrive to look for events.
If you tell BoardDrive your name, it will use it for one of the choices in the sub-folder name drop-down.
To provide your name:
- Touch the Menu button or the drop-down button in the top navigation bar.
- Touch the Your name option.
- Type in your name in the dialog and touch OK.
Depending on the naming policy selected in Settings, BoardDrive will pre-select a sub-folder name for you.
To tell BoardDrive which naming policy you prefer:
- Touch the Menu button or the drop-down button in the top navigation bar.
- Touch the Auto-folder naming policy option.
- Select a naming policy you prefer and touch the Select button.